Electronics Lab
This activity introduces the concept of an electronics project lab and provides practice in their use.
Introduction
We use an electronic project lab like this one. It has a wide range of electronic components, each with spring terminals so that you can connect the components, using insulated hookup wire with tinned, copper, ends, without the need for a soldering iron.

The electronics project lab comes with a very good booklet, which explains the function of each of the electronic component types and then presents 200 projects to build, complete with a description of operation, circuit diagram and wiring sequence. Here is one example:

These sets are great for a School Amater Radio Club. Especially when some students have already completed an activity and would like to do something on their own.
Preparation
You will need:
- An electronic project lab of the type shown. Even a small one will do.
- Batteries to suit.
Activity
- Lead the students through some of the initial projects, which are intended to build understanding and confidence.
- Review the list of projects with them, explaining what some do.
- Let them tackle a few projects on their own. Provide supervision if neccessary.
- Ensure that all parts are returned to the kit for next time.
Homework
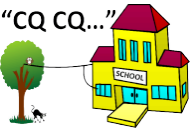
- Take a photo copy of some of the projects you have built on the electronics lab, ones which particulary interest you.
- Can you think of cool applications for these circuits, or ways you could modify them, or use them at home?
- Draw a sketch of what a device using your circuits might look like, in its own case, with batteries and switches, etc.
- Next time ask your supervisor where you can buy the individual components to build your circuit, how much they would cost and how long it would take to build it.
- Ask how you could construct the circuit using more permanent construction methods like Prototyping board, Veroboard or Manhatten style construction on copper clad board, using a soldering iron.
- Bring along the parts, next time, and get going.